Show Data in the Custom Inspector
So we replaced Unity’s built-in Inspector with our own Custom Inspector, but it doesn’t show us anything yet. This is where we start to roll up our sleeves and write the code that puts data in the Custom Inspector’s space on your Unity IDE. It will only show what we tell it to show, which means we have to do the work for every single thing we want to see. But, it also means we have control over how that data is displayed, and also what our Custom Inspector does with it.
Visual Trees
To see data, we will build a “visual tree.” When you build a Scene in Unity, you are building a tree. The empty Scene is the root of the tree. It can contain any number of GameObjects. As you probably know, each GameObject can contain any number of “child” GameObjects. This can go on forever, but the whole collection forms a structure shaped like a tree. It’s what you see when you look at your Scene in the Unity IDE’s Hierarchy window:
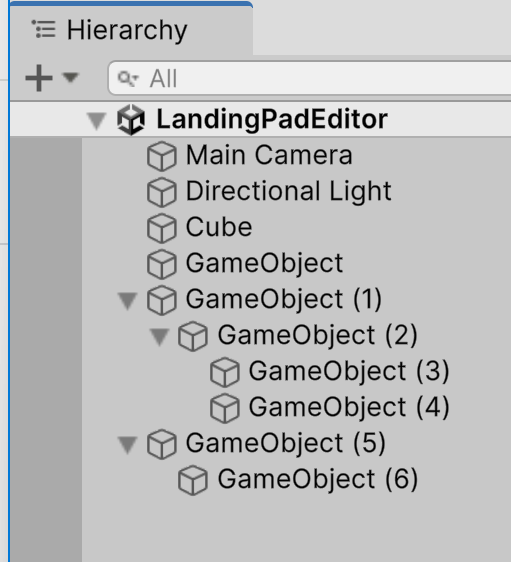
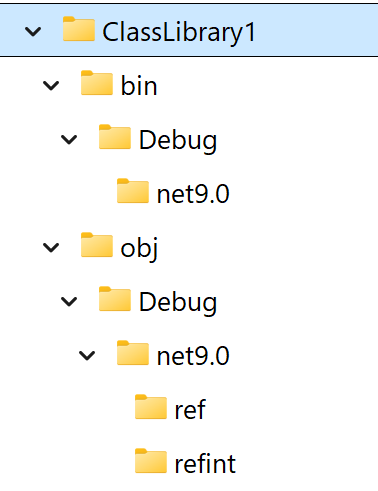
Even before you created your first Unity Scene, that structure might have looked familiar. It’s the same one your folders and files use to store all your computer’s data. That’s all in a tree too:
Visual trees use the same structure. You’ll start with a single container, which is an object of type VisualElement. That will be the root of the tree containing all the items you’ll use to display data in your Custom Inspector. Let’s do that right now. Add two lines to your CreateInspectorGUI method, like this:
    public override VisualElement CreateInspectorGUI()
    {
        VisualElement root = new();

        Label hello = new("Hello Custom Inspector World!");
        root.Add(hello);

        return root;
    }
Let Unity compile that, select your GameObject that has a MyClass component on it, and you’ll see your Custom Inspector is, at last, showing you something:

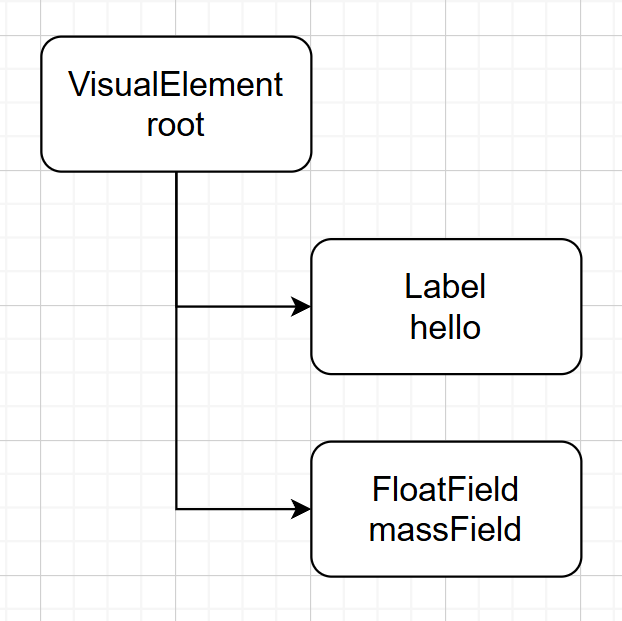
Those two lines created a UI Toolkit object of type Label, and added it to the visual tree’s root. The resulting visual tree has this structure:
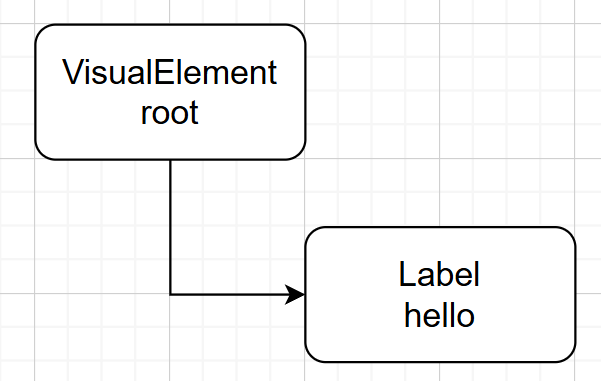
In the jargon of computer science, we would say there are two “nodes” in this tree, that it has one “branch,” and one “leaf.” The object in variable root is the root of the tree. The object in variable hello is a leaf. Adding hello to root created a branch that connects them.
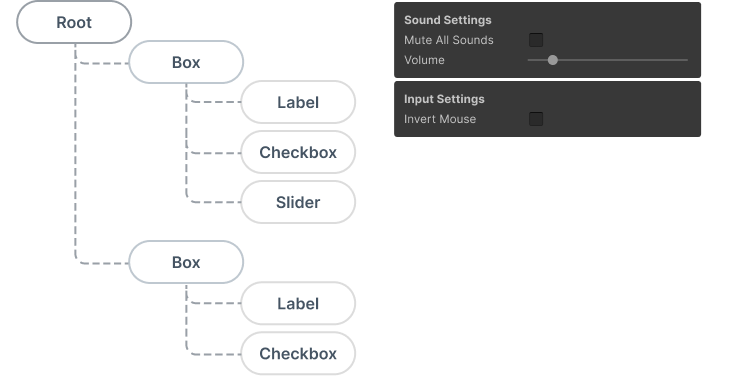
Other than a tree with nothing but a root, this is the simplest tree you could make. But from here, you can probably see how, by adding more objects to nodes in the tree, you can start to make much more complex (and much more useful) tree structures. Here’s an example from the Unity manual:
Binding Data
We’ve got our Custom Inspector talking to us now, but it still isn’t telling us anything about the data in the MyClass component it’s inspecting. Let’s get it doing that by “binding” an object in the visual tree to a field in our component.
To do that, we’ll add another UI Toolkit object to the visual tree. This one will be of type FloatField. Here’s what your CreateInspectorGUI method will look like when you’re done:
    public override VisualElement CreateInspectorGUI()
    {
        VisualElement root = new();

        Label hello = new("Hello Custom Inspector World!");
        root.Add(hello);

        FloatField massField = new FloatField();
        massField.label = "Gravity";
        massField.bindingPath = "mass";
        root.Add(massField);

        return root;
    }
Let Unity compile that and here’s what you’ll see in your Custom Inspector:

And now you’ve actually customized something! Unlike the built-in Inspector, which labels a field with the field’s name, our new Custom Inspector labeled the “mass” field “Gravity.” Deliberately misnaming your fields may not always be a great idea, but now you can see how a Custom Inspector gives you options that the built-in Inspector doesn’t.
Here’s the visual tree your code is creating:
Note that the order in which you create things affects the order in which they appear in your Custom Inspector. (Try changing your code to add the FloatField first, and the Label second, and see how that looks.)
The binding you’ve created works both ways. Not only can our Custom Inspector read the value in mass, editing what you see in the Custom Inspector changes the value in mass. Add this Start method to your MyClass and run the Scene:
using UnityEngine;

public class MyClass : MonoBehaviour
{
    public float mass = 169.2f;
    public string words = "None shall pass!";

    [SerializeField]
    private bool isGood = true;
    private int count = 42;

    void Start()
    {
        Debug.Log("Starting...");
        Debug.Log($"mass = {mass}");
    }
}
You’ll see this in your Console:
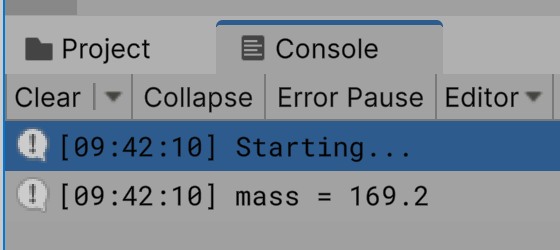
Stop the Scene and use your Custom Inspector to set the value to something else:

Start your Scene again and here’s what you’ll see on the Console:
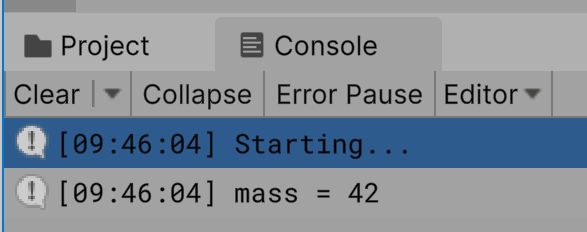
Your Custom Inspector is actually letting you both see and modify the value it displays.
In our next article, we’ll see how to make the Custom Inspector enforce limits on the values allowed for a field.
Leave a comment
Log in with itch.io to leave a comment.