The UI Builder
A Graphical Editor
So far, our Custom Inspector has used pure C# for everything. This includes creating the controls, positioning and sizing them, and processing input. You can do all of your Custom Inspector work that way. But it can be a bit like working with your eyes closed, because you can’t see what your code is going to create until you let Unity compile it and put the results on the screen in the Unity IDE.
The UI Builder is a tool that you can use to see your Custom Inspector as you create it, all in a graphical editor. You’ll still have a C# class you tag with the CustomEditor attribute, but it will need very little code to create the UI (and, for the most part, you’ll use the same code for every UI you create).
Making a UI
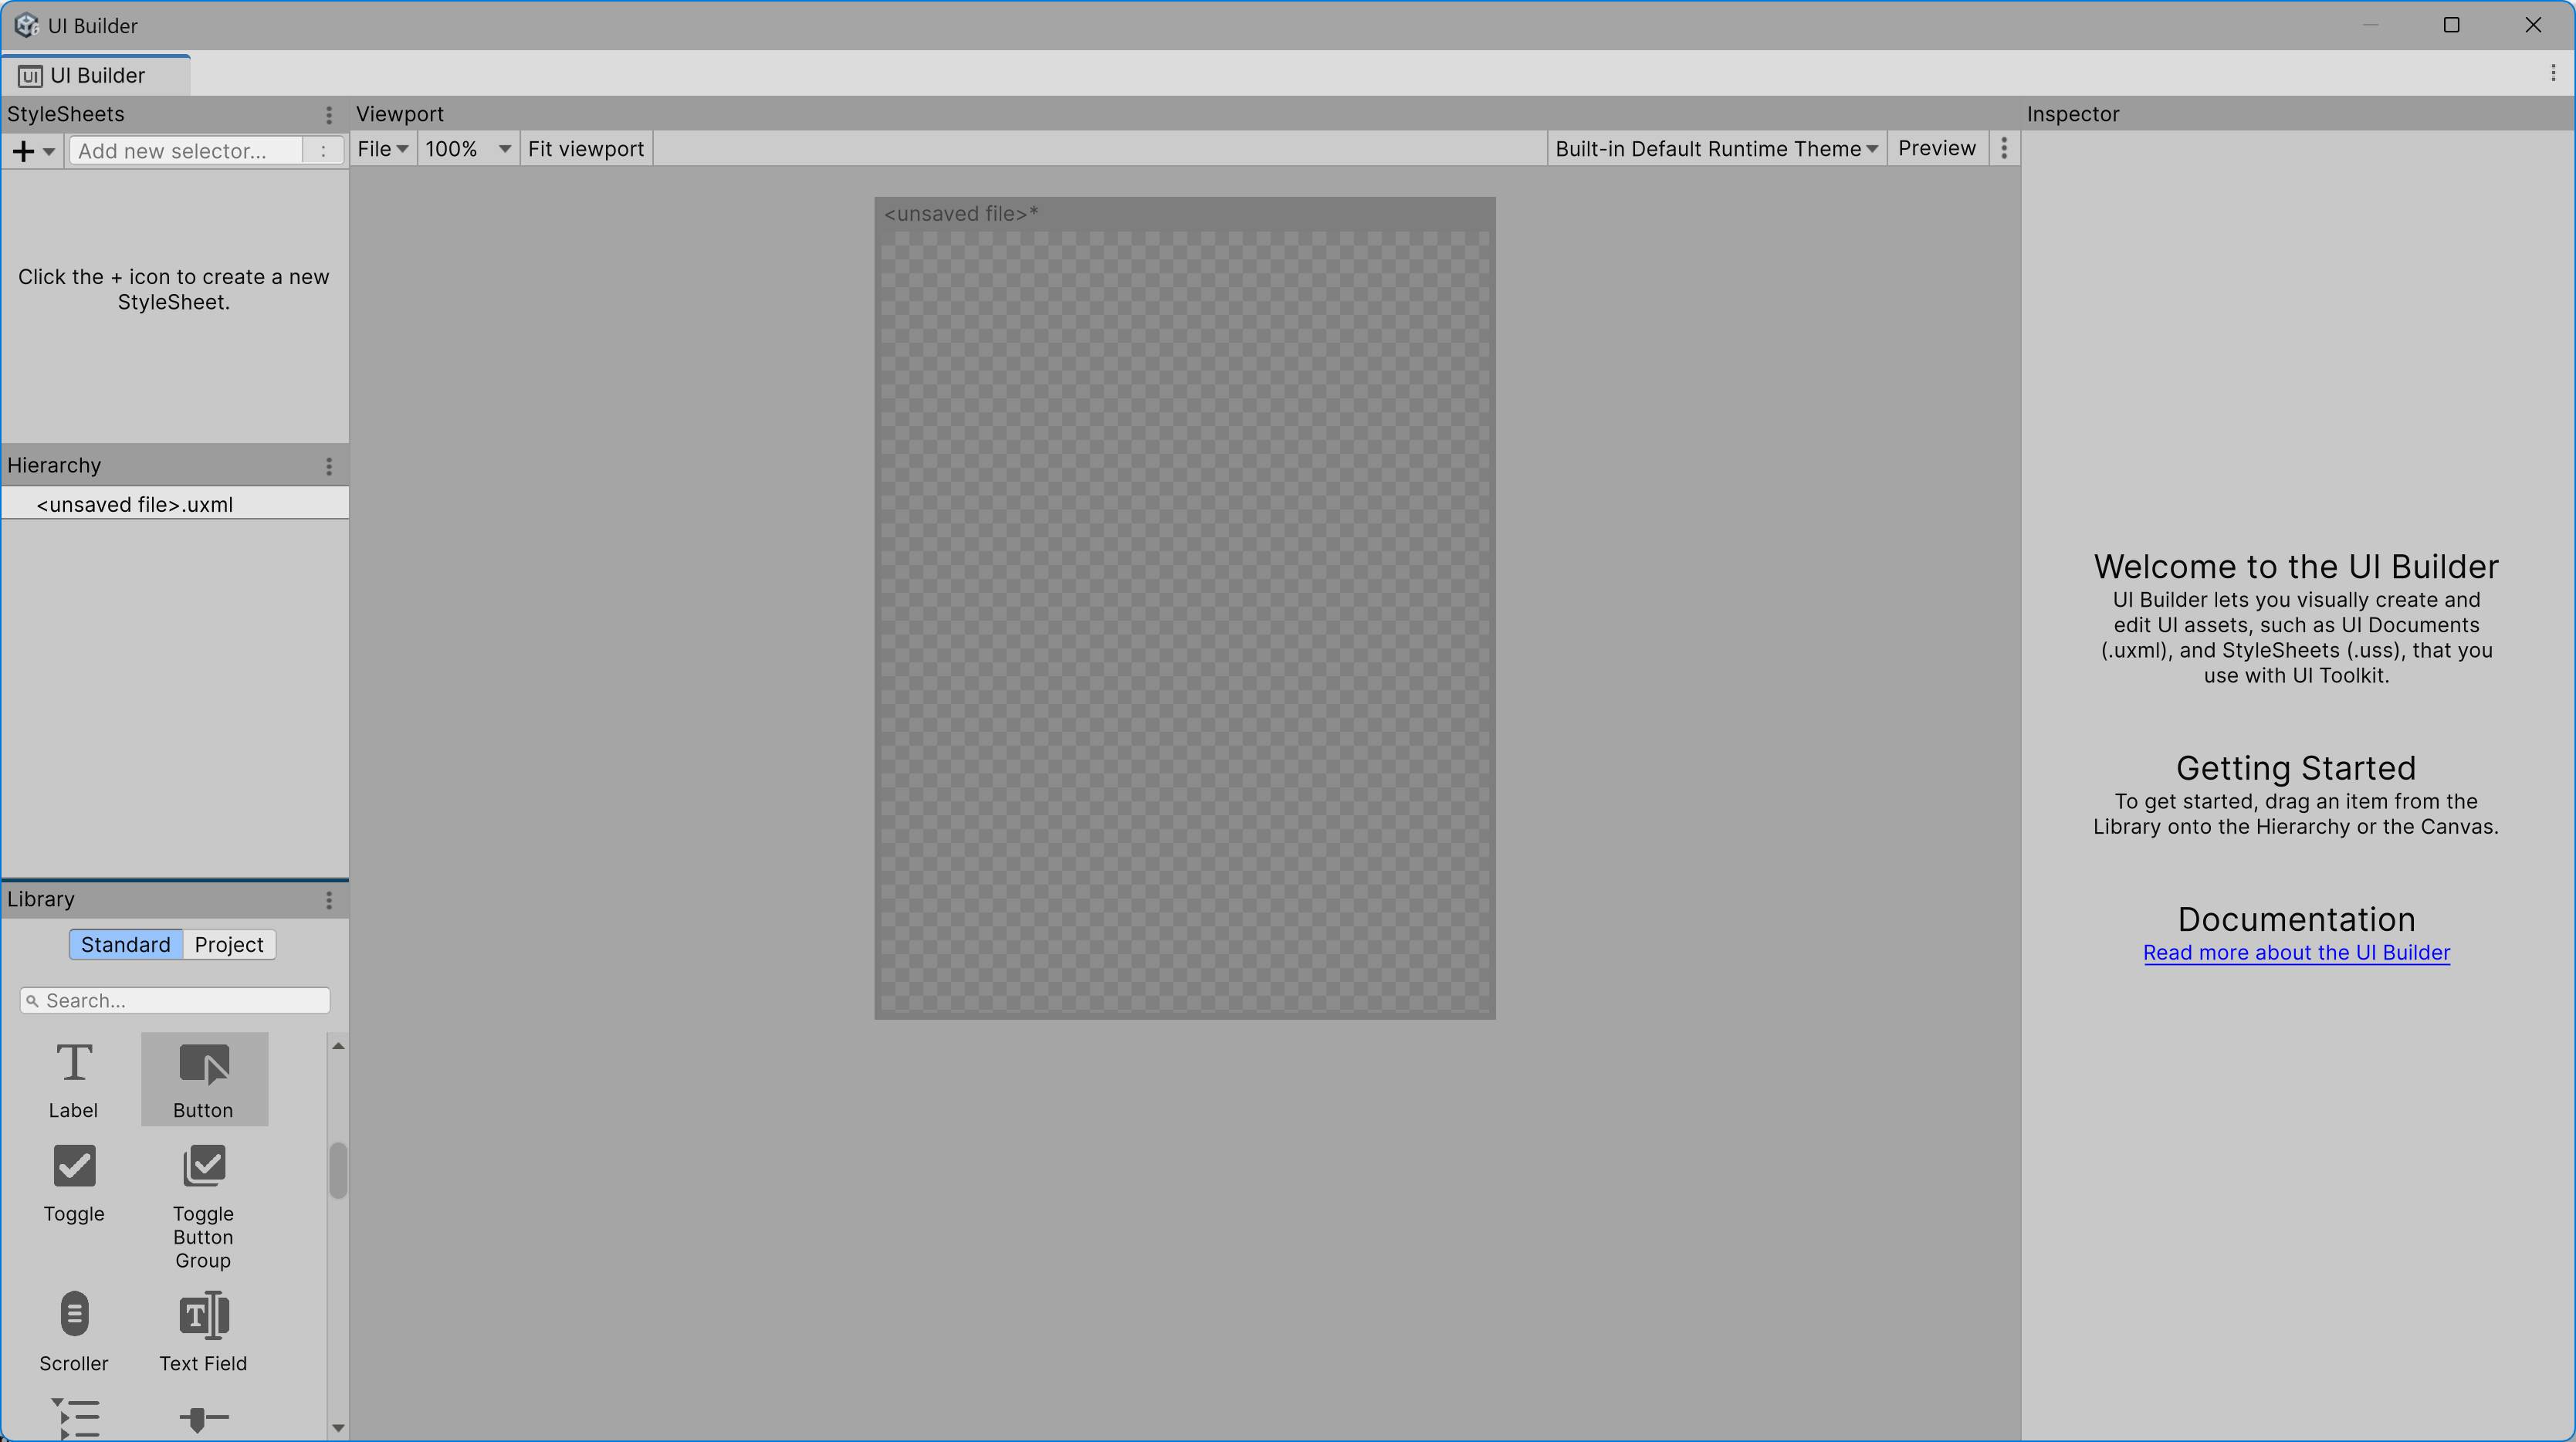
Use Window / UI Toolkit / UI Builder to start the UI Builder. You’ll notice right away that it insists on staying on top of your Unity IDE. You can resize it so you can peek behind it, and you can even drag its tab and dock it into a pane in the Unity IDE. But you can’t put the IDE on top of it, nor can you minimize it. This can be a little frustrating if you’re trying to see some other part of your project. Certainly, if you have more than one monitor, you’ll want to move the UI Builder to a screen of its own.
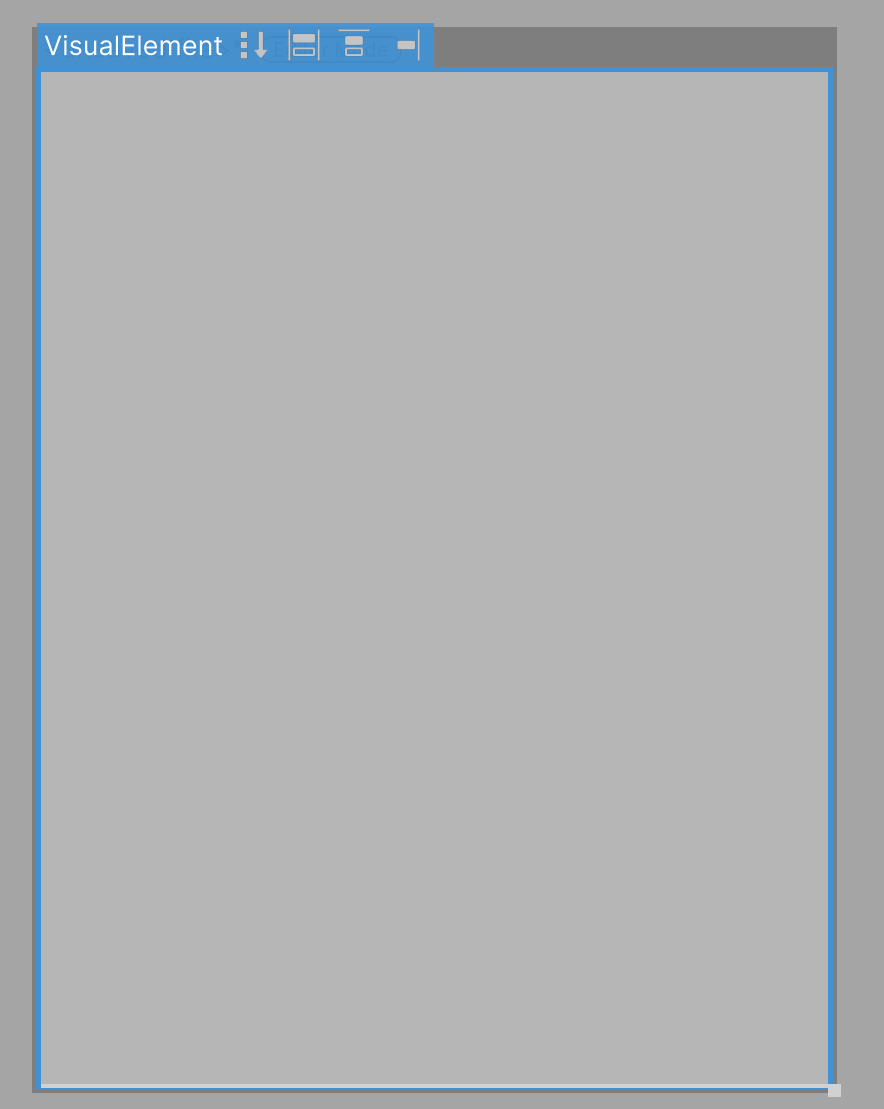
When you start it up, you’ll see something like this:
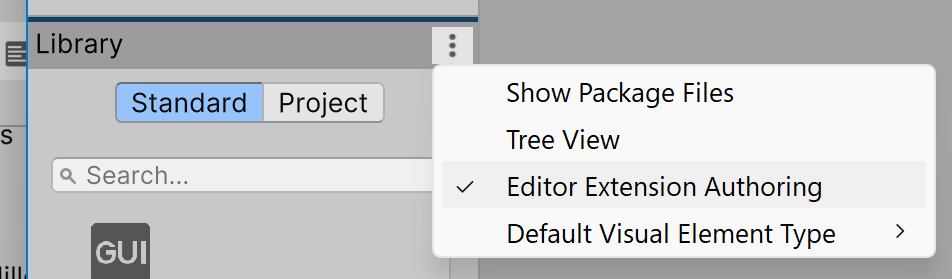
Right away, you’ll want to make two changes. First, from the three-dots menu in the Library pane, check “Editor Extension Authoring.”
Second, in the upper right of the Viewport pane, switch from “Built-In Runtime Default Theme”

to “Active Editor Theme”
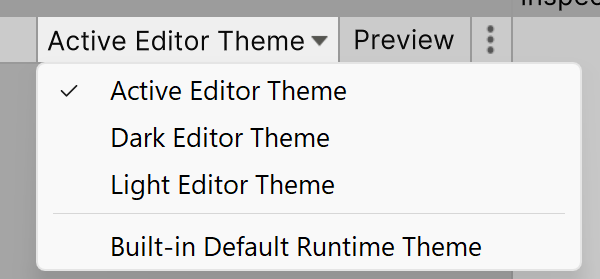
This will display your UI in the same theme you’re using in the Unity IDE, which is the most accurate way to know how your UI will look when you use it.
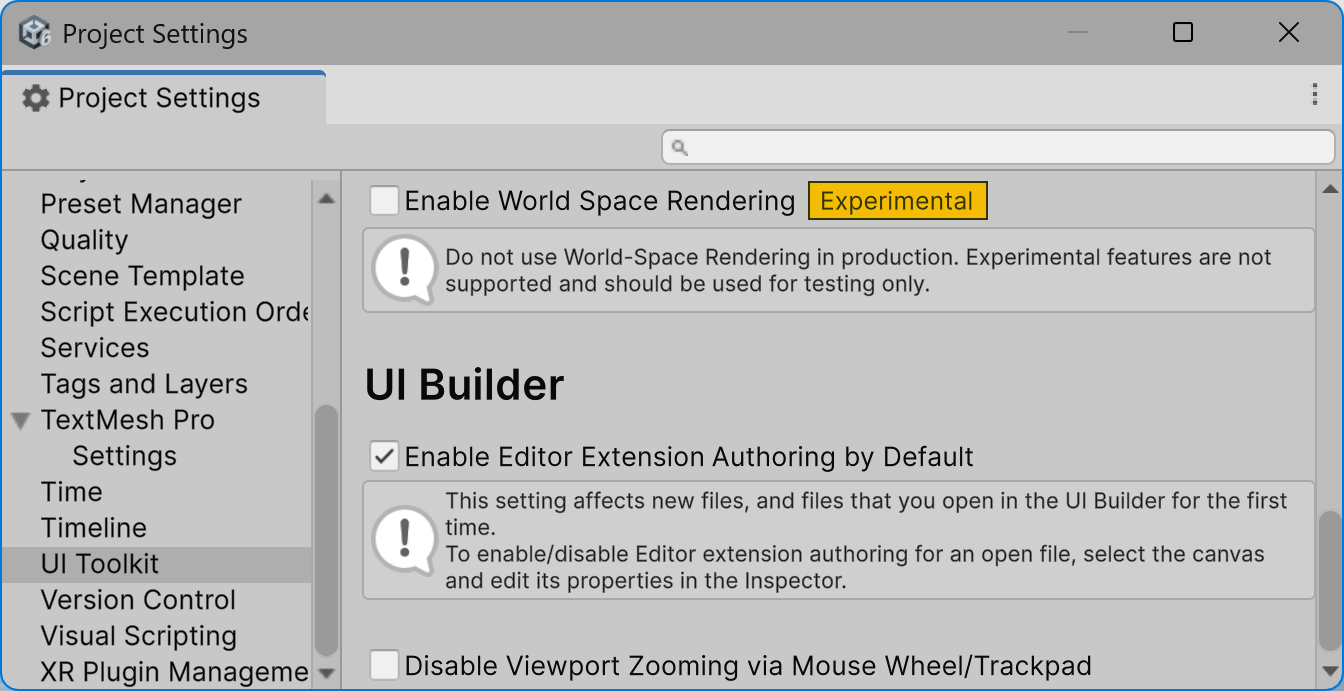
| 💡You can make the Editor Extension Authoring setting the default in your Project Settings. This is a good idea. Unfortunately, you can't set this in your Preferences, so you will have to do it for each project individually. |
The Visual Tree
Now you can use the UI Builder to make a visual tree without writing any code. Start by adding a VisualElement by dragging the Visual Element icon from the Containers part of the Library pane onto the blank window in the middle of your UI Builder. You’ll see it represented as a blue frame:
Let’s start with two simple controls that will do the same thing we did before in our Custom Inspector for MyClass objects: add a label and field we can use to enter a number.
Drag and drop a Label from the Controls part of the Library pane onto the Visual Element you just created:
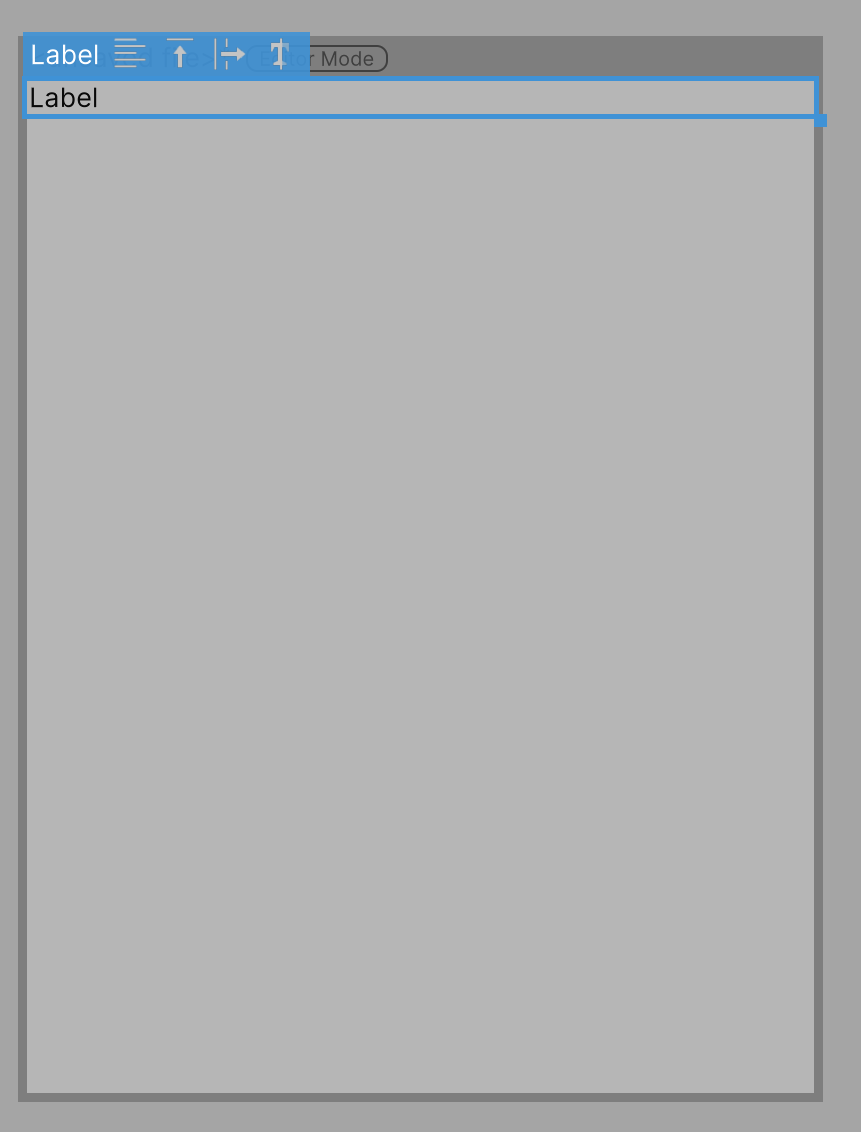
The display is, I imagine, about what you’d expect. On the right, however, you’ll see what may be a bewildering set of parameters, just for that simple Label control. Don’t let that worry you! Like most things in Unity, the values of all those settings are, upon creation of a new Label, good ones to start with.
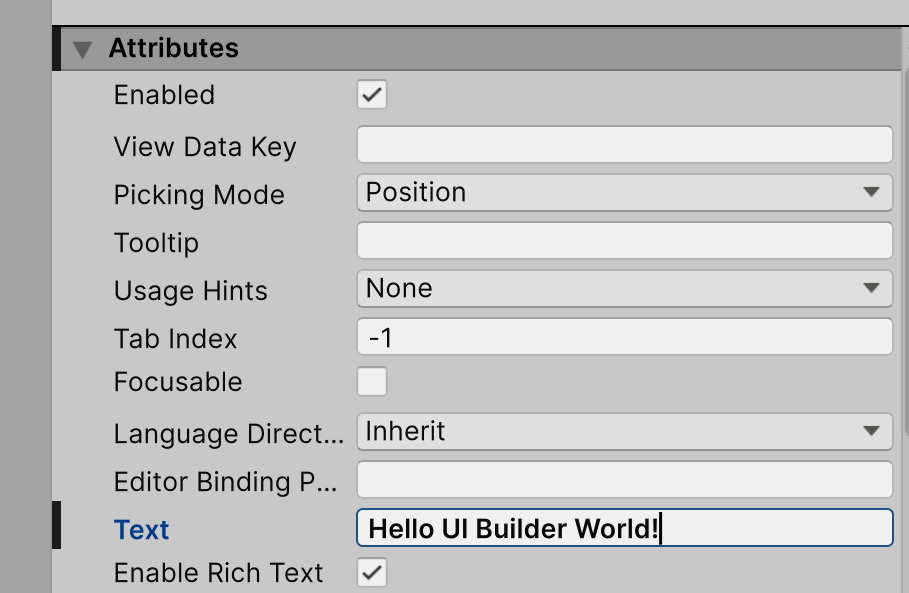
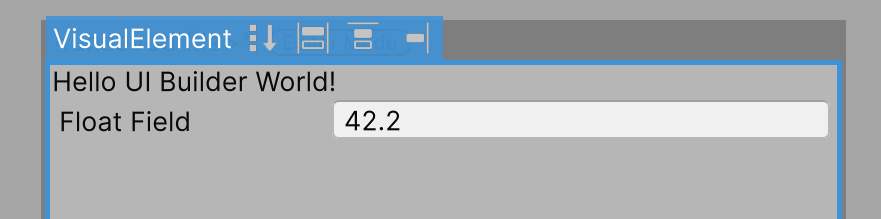
Scroll up to the top of all those settings and find the one that says “Text” in the Attributes section. This is the text your Label will show. Change that now to “Hello UI Builder World!”
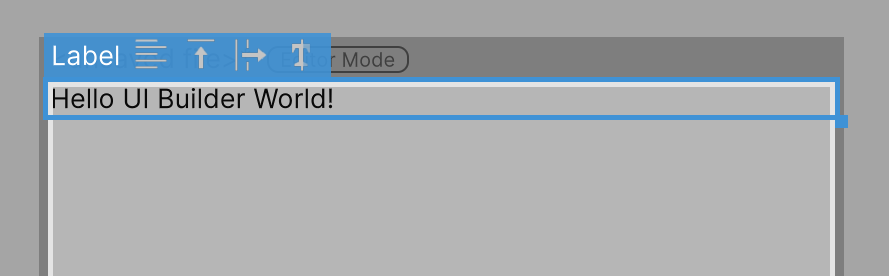
As soon as you do, you’ll see matching text in your UI window:
Now drag a Float from the Numeric Fields part of the Library pane into the Visual Element you created, just below the label. Click in the blank area outside the window to deselect the Float Field, and this is what you’ll see:
Now have a look at the left side of the UI Builder window and find the Hierarchy pane. You’ll see the visual tree you’ve just made:

Click on the arrow to the left of the FloatField and you’ll open up its built-in visual tree:
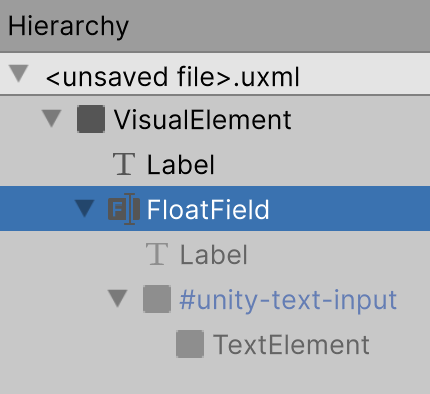
Notice that the members of the tree are in light gray, which means you can see their parameter settings in the UI Builder’s Inspector, but you can’t change them. This is a weakness of the UI Builder that you don’t face in pure C#. To get around it, you need to use style sheets, which we’ll get to later.
UXML, the “Other” Tree
An important aspect of the UI Builder is just what it is building. Yes, it builds a UI, but as you can see in that Hierarchy pane, it creates a visual tree at the same time. It would be nice if that meant it could also produce C# that created the visual tree, but that’s not how it works.
To see how it works, choose “Show UXML/USS Previews” from the Viewport pane’s three-dots menu. At the bottom, you’ll see two new subpanes appear, with “UXML Preview” on the left and “USS Preview” on the right:
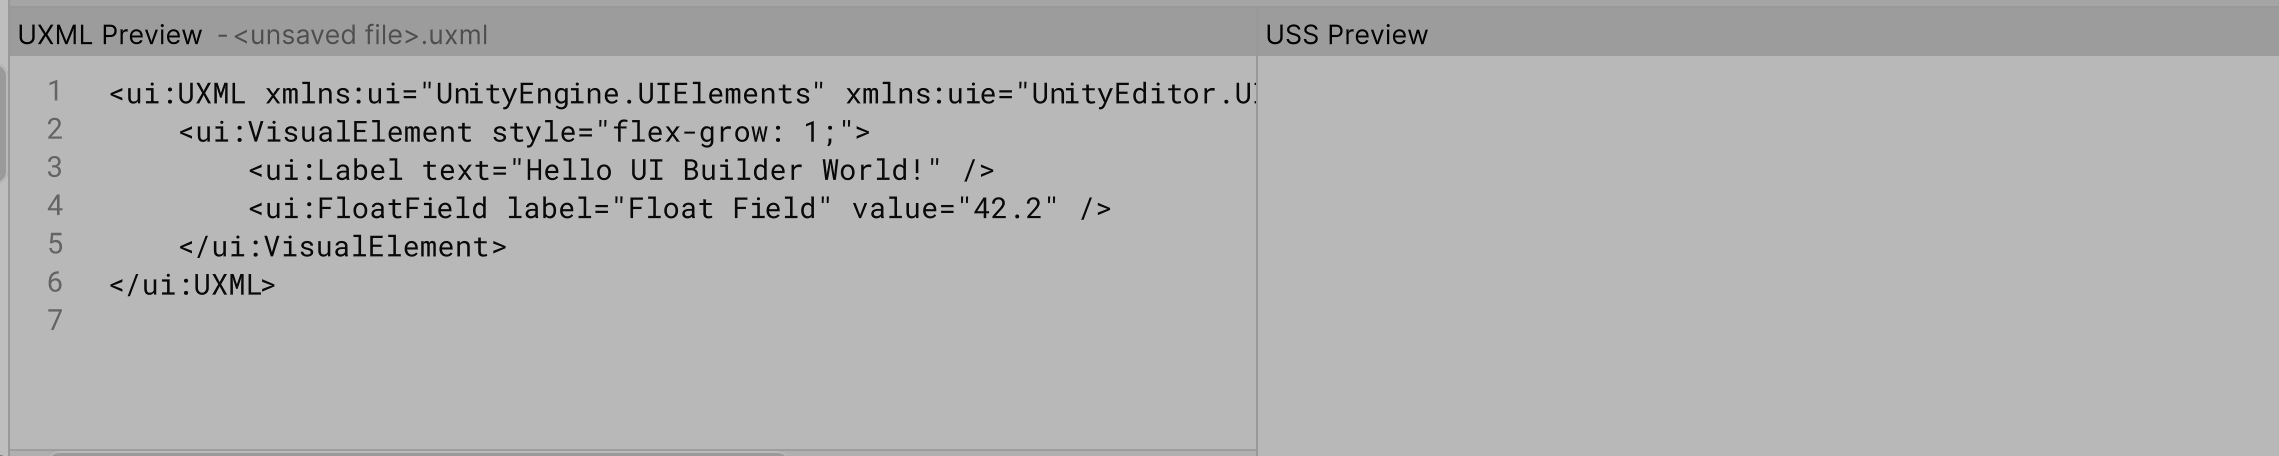
The USS Preview will be empty because you don’t have a style sheet yet.
The UXML Preview will have a few lines in it. This is what the UI Builder actually creates for you. If you know XML or have worked with XAML, this will seem familiar. It’s a set of tags, mostly in pairs, each of which represents a node in the visual tree. That first one, that starts <ui:UXML... creates the root of the visual tree. Each tag can also have attributes whose values are set in the tag. For example, Line 3 creates a Label and uses its text attribute to set the text. Note that, although we can see in the Hierarchy that the FloatField has more nodes nested inside it, those don’t appear in the UXML file. They’re inside the FloatField itself.
If a tag doesn’t have any child nodes in the visual tree, it typically will not be part of a pair. Instead, the last character in the tag will be a slash, is in Lines 3 and 4.
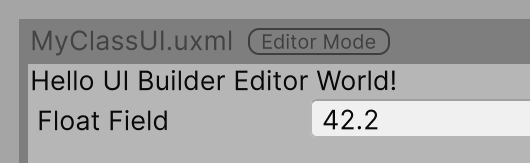
You can’t edit the UXML file in the Preview area, but you can export it to an editor, change it, and use the changed version. Use the File dropdown in the Viewport pane and save your UXML file as “MyClassUI,” then click on the boxed arrow in the upper right of the UMXL Preview area. Use your editor to change the label text:
<ui:UXML xmlns:ui="UnityEngine.UIElements" xmlns:uie="UnityEditor.UIElements" editor-extension-mode="True">
    <ui:VisualElement style="flex-grow: 1;">
        <ui:Label text="Hello UI Builder Editor World!" />
        <ui:FloatField label="Float Field" value="42.2" />
    </ui:VisualElement>
</ui:UXML>
Save and close the UXML file in your editor, and return to the UI Builder. You’ll see your changes have taken effect:
Changing the actual contents of the UXML file is possible and sometimes necessary. But if you make a mistake, the UI Builder may not be able to show your UXML as a graphical display in the Viewport. Use this ability with caution.
Using the UXML File
Replace the code in your MyClassEditor with this (you might want to save a copy of it first):
using UnityEditor;
using UnityEngine.UIElements;

[CustomEditor(typeof(MyClass))]
public class MyClassEditor : Editor
{
    public VisualTreeAsset visualTree;

    public override VisualElement CreateInspectorGUI()
    {
        VisualElement root = new();

        visualTree.CloneTree(root);

        return root;
    }
}
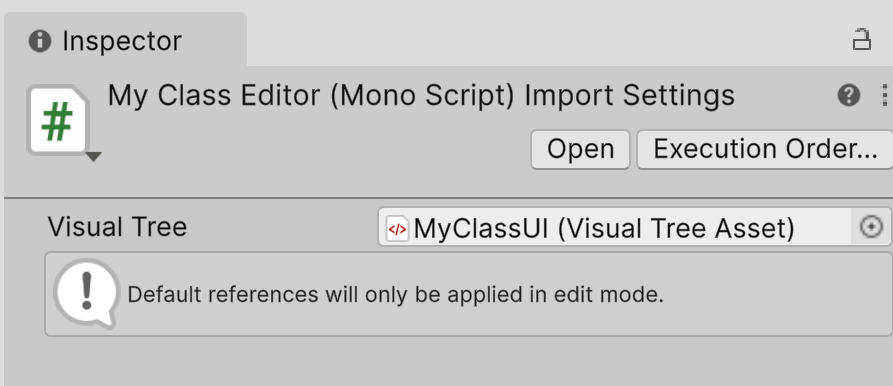
You can see there is no C# code to create a Label or a FloatField in this version of CreateInspectorGUI. Instead, it creates the root VisualElement, then uses a VisualTreeAsset to make a copy (a “clone”) of a visual tree into that root. The VisualTreeAsset is kept in the new member field, visualTree. You define it by selecting MyClassEditor in your Assets folder, then dragging and dropping the MyClassUI file into its field in the Inspector:
Now select your GameObject with the MyClass component on it and you’ll see the UI you created in the UI Builder in the Inspector:

However, if you change the value in the FloatField, that won’t change the value stored in mass in your component. That’s because we haven’t bound the field and the variable yet. (Remember that we did that with C# code before, and that code isn’t in our latest version of CreateInspectorGUI.)
In the next article, we’ll see how to bind UI fields to component variables and add validation when using the UI Builder.
Leave a comment
Log in with itch.io to leave a comment.