Binding in the UI Builder
In the last article, we built a small Custom Inspector interface in the UI Builder. That did the work we had done before in C#, greatly simplifying our CreateInspectorGUI method. But, it didn’t bind the FloatField we created to a member field of our MyClass object.
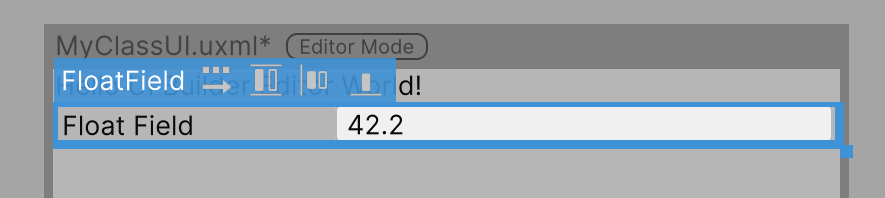
Binding to a field is very easy using the UI Builder. Select the element you want to bind by clicking on it. In this case, that’s the FloatField:
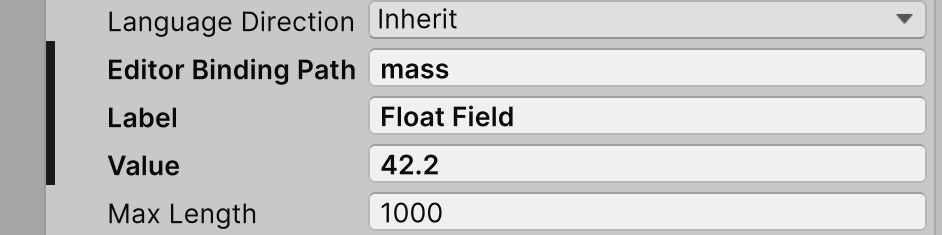
Then scroll in the Inspector until you find the “Attributes” section at the top. Find the field named “Editor Binding Path” about a third of the way down. Type in “mass,” the name of the field you want to bind the FloatField to:
This is also a good time to change the label on the FloatField. Let’s also call that “mass.” Save your UI file and see that the changes have taken effect in the Unity UI:
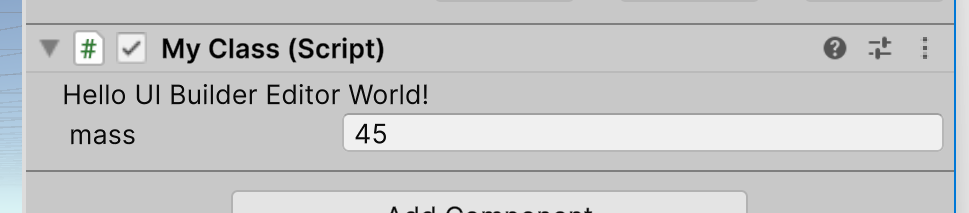
Now if you change the value shown in your Custom Inspector, select a different GameObject, and return to the one with your MyClass component, you’ll see the value you typed in is still there.
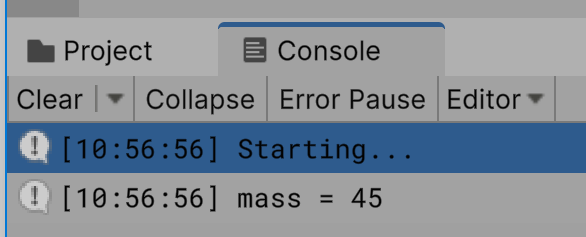
Let’s go one step further to really verify that your value is being entered into the bound field in the component. Make sure this bit of code is still in MyClass:
    void Start()
    {
        Debug.Log("Starting...");
        Debug.Log($"mass = {mass}");
    }
Run the project and you’ll see the value you typed into the Inspector output on the Console:
The binding works! The UI Builder made it much easier to create our Custom Inspector. We were able to design it in a graphical editor, and even bind a field. We can layout as many items and bind as many fields as we like. But we’re still not in the same place we were when we used pure C# to create our Custom Inspector. That version validated input and made sure the developer did not use a negative value. We will do that again, and will have to use C#, because the UI Builder has no validation capability of its own.
Now, when we validated data before, we did it by assigning an event handler method to the FloatField we created. That’s how we’ll do it this time too. But, in our pure C# version, we had a reference to the FloatField because our code created it. In this version, it is created by Unity after we use the UI Builder to generate the UXML file that describes our interface. Our code doesn’t have a reference to it. We will have to get one out of the visual tree.
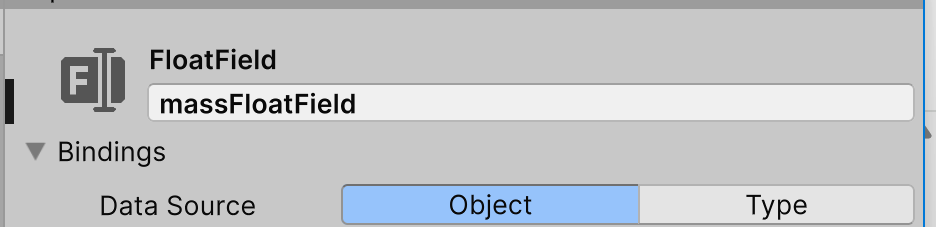
To do that, we need to give the FloatField a unique name. We’ll call it “massFloatField” by selecting it and entering that name at the top of the UI Builder’s Inspector.
 ’
’
Note that a quirk of the UI Builder is that it won’t actually assign that name until the field you type it into loses the focus, so be sure to click out of the field before saving your UI file.
Now you can query the visual tree and get a reference to the FloatField named “massFloatField” this way:
massField = root.Q<FloatField>("massFloatField");
From here, the rest of the code you will need to test the value entered, correct it if necessary, and inform the developer is the same as in the pure C# version, so we won’t repeat that.
C# or UI Builder?
It’s possible to skip the UI Builder completely and do all your work in C#. As you have seen above, it is not possible to skip c# completely. So should you use the UI Builder at all? That’s a matter of personal choice, but it does let you interactively test how your UI will respond to changes in layout in the Unity IDE. That’s an important feature of good UI design. You can’t be sure the developer will use any particular shape to hold your Custom Inspector. So, you’ll want to design it such that it adapts itself well to any rectangular dimensions that could reasonably contain it.
Successfully creating a UI that adapts itself to different layouts when it is used is a bit of a challenge. Not because it’s hard to do, but it does require that understand a concept Unity’s UI Toolkit borrowed from web browers, called the “FlexBox.” Using “flex” lets you define how elements of UI will grow and shrink, when the rectangle containing your UI changes dimensions.
In the next article, we’ll see how flex works.
Leave a comment
Log in with itch.io to leave a comment.